- 6,371
- 823
- 113
Many of our members have been taking advantage of one of our site's features - Pictures & Albums. Since we've had so many new members join our community over the past few months, I wanted to take a moment and make a quick tutorial on how to add photos to your profile.
The first thing we need to do is create an album.
In the center of the navigation menu bar at the top of the page you'll see a link called "Community". Click on that.
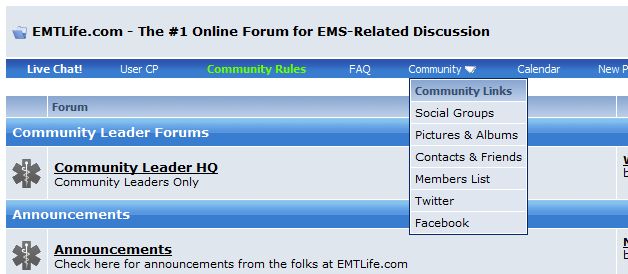
Clicking on "Pictures & Albums" will take you to a menu that shows recently uploaded albums as well as your albums.
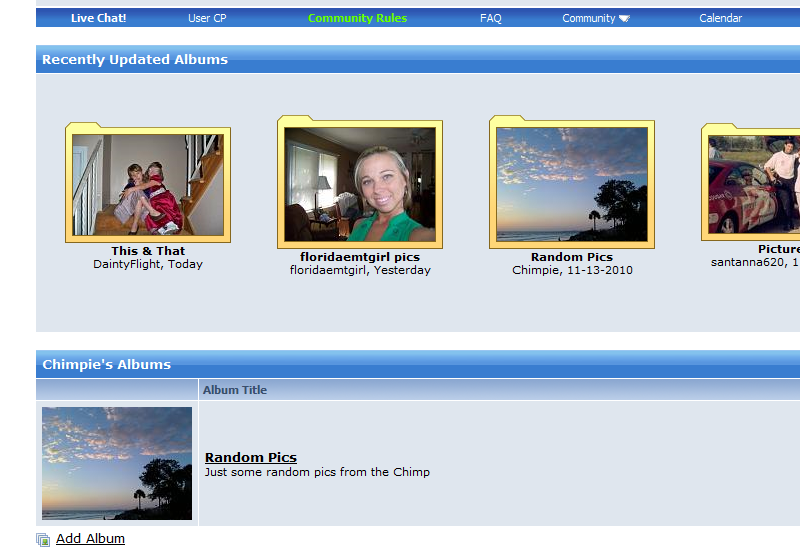
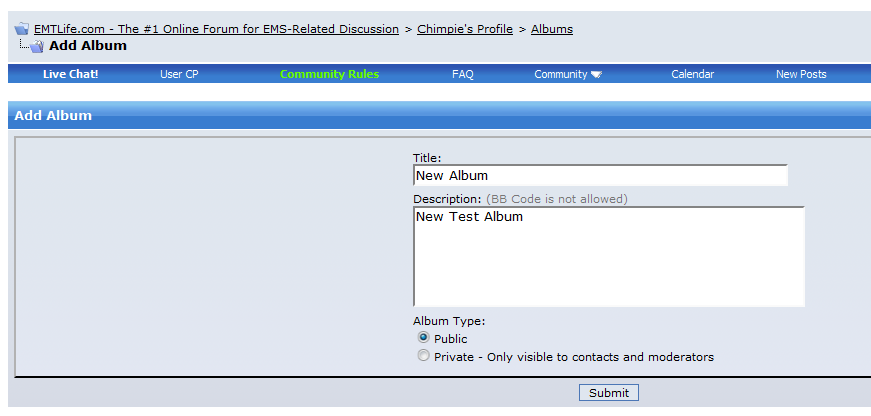
To create your first album, click on "Add Album". Here you will be prompted to create a title and description for your album, plus designate whether you wish it to be public or private (EMTLife Friends only). Once you're done, click "Submit".
Your album has now been created. Let's upload some pictures. Click on either "Upload Pictures" or "Click here to upload pictures!"

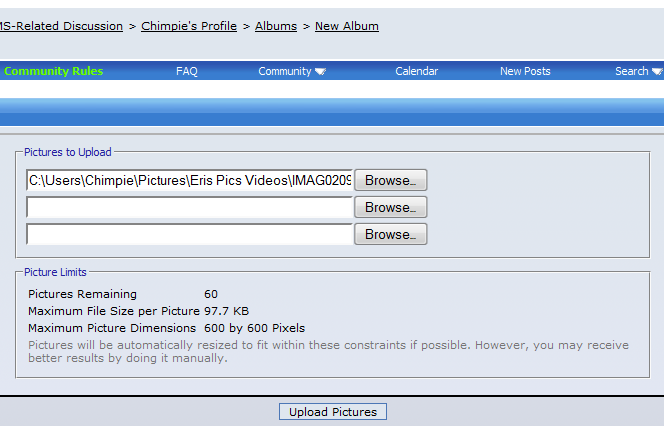
The next screen will allow you to upload up to three pictures at a time. You can upload up to 60 per album. It's best if your pictures are no larger than 600 x 600. If they are larger, the software will automatically resize them for you.
Click on "Browse" and select which picture you'd like to upload. Then click "Upload Pictures".
The next screen will allow you to give your picture(s) a caption, choose which one will be the album cover, or even move pictures between albums. Once you're done click "Save Changes".
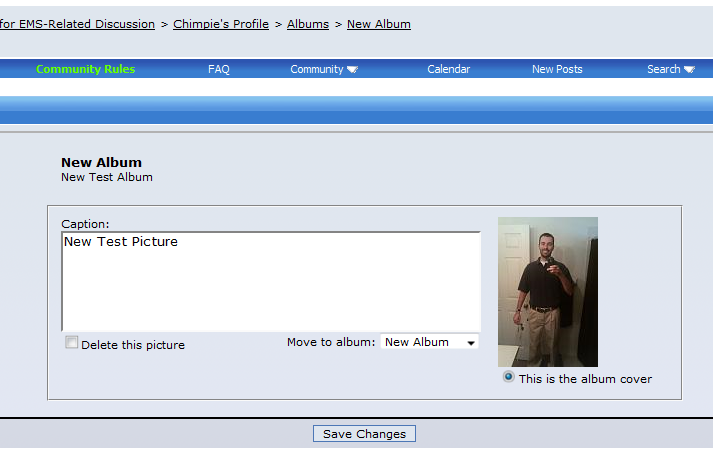
That's it. You're all done.
The first thing we need to do is create an album.
In the center of the navigation menu bar at the top of the page you'll see a link called "Community". Click on that.

Clicking on "Pictures & Albums" will take you to a menu that shows recently uploaded albums as well as your albums.

To create your first album, click on "Add Album". Here you will be prompted to create a title and description for your album, plus designate whether you wish it to be public or private (EMTLife Friends only). Once you're done, click "Submit".

Your album has now been created. Let's upload some pictures. Click on either "Upload Pictures" or "Click here to upload pictures!"

The next screen will allow you to upload up to three pictures at a time. You can upload up to 60 per album. It's best if your pictures are no larger than 600 x 600. If they are larger, the software will automatically resize them for you.
Click on "Browse" and select which picture you'd like to upload. Then click "Upload Pictures".

The next screen will allow you to give your picture(s) a caption, choose which one will be the album cover, or even move pictures between albums. Once you're done click "Save Changes".

That's it. You're all done.
